Calming & Rewarding: Make Cherry Preserves from Scratch
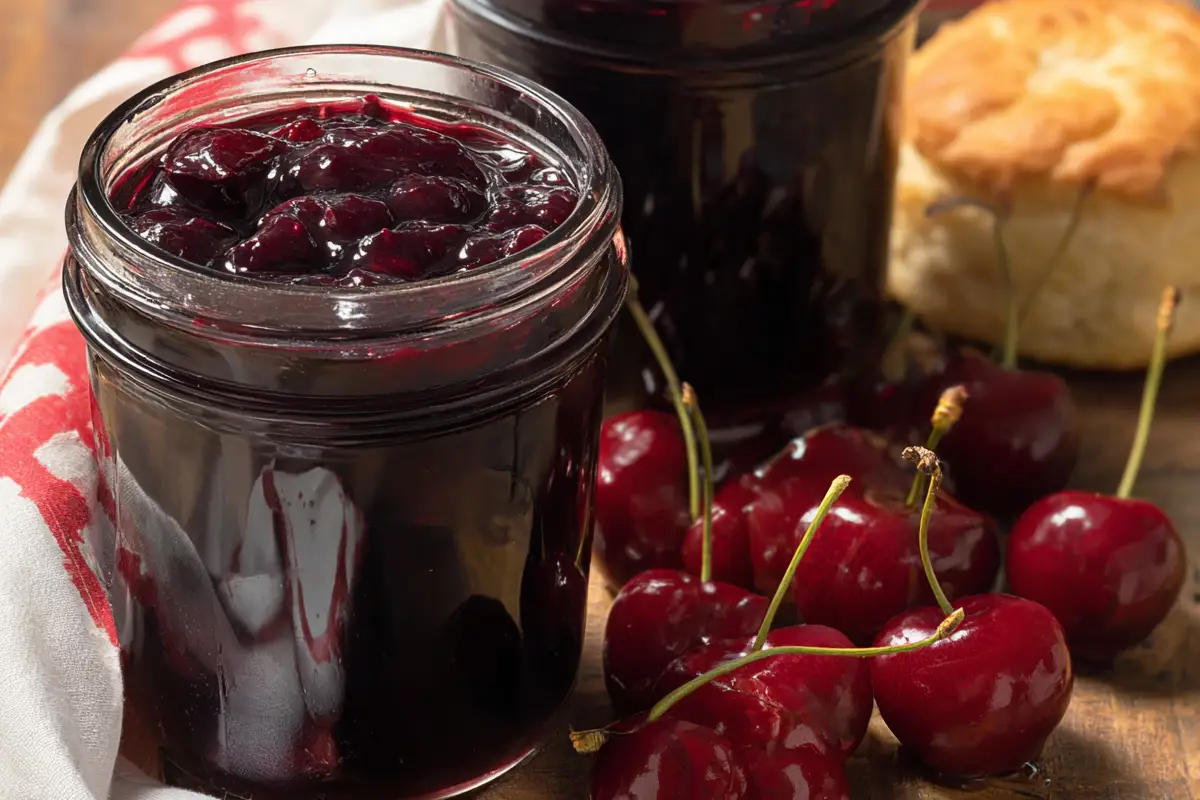
There’s a unique kind of magic that unfolds in the kitchen when you transform fresh, vibrant fruit into something truly special. Few culinary adventures capture this essence quite like making homemade cherry jam preserves. It’s an experience that transcends mere cooking; it’s an act of self-care, a journey into nostalgia, and a deeply satisfying way to capture the fleeting sweetness of summer. Imagine the simple joy of opening a jar on a chilly morning, the rich, ruby-red hue glowing, and the irresistible aroma of cherries filling your senses – a testament to time well spent and love poured into a jar. This isn't just about creating a delicious condiment; it's about embracing a process that many find profoundly calming and rewarding. In a fast-paced world, the deliberate, unhurried rhythm of making preserves offers a welcome respite. From pitting plump cherries to watching the mixture bubble gently on the stove, each step is an invitation to slow down, be present, and savor the moment. And the reward? A pantry stocked with golden-hour goodness, ready to elevate everything from your morning toast to elegant desserts.The Timeless Allure of Homemade Cherry Jam Preserves
For generations, preserving food has been a cherished tradition, connecting us to our roots and simpler times. There’s something inherently comforting about it, a sense of self-sufficiency and resourcefulness that resonates deeply. When you embark on the journey of making homemade cherry jam preserves, you’re not just following a recipe; you’re participating in a legacy. The distinction between homemade and store-bought cherry jam is often stark, immediate, and utterly undeniable. While commercial jams offer convenience, they rarely capture the vibrant, unadulterated essence of fresh fruit. Homemade preserves, on the other hand, burst with an authentic, multidimensional flavor that only truly ripe, seasonal cherries can provide. You control the sweetness, the texture, and even subtle flavor notes you might introduce, like a hint of vanilla or almond. The result is a glossy, jewel-toned spread that tastes exactly like summer, carefully bottled for enjoyment all year long. It’s a flavor experience that will likely convince you that once you go homemade, there's truly no turning back. For more on this delightful transformation, explore Beyond Store-Bought: Elevate Toast with Homemade Cherry Jam.Essential Ingredients & Tools for Your Cherry Jam Journey
One of the most appealing aspects of making exquisite cherry jam preserves is the simplicity of the ingredient list. You don't need a pantry full of exotic items; just a few key players combine to create something truly magical. Here’s what you’ll need:- Fresh Cherries: The undisputed star of the show. While many varieties work, sweet cherries like Bing, Rainier, or Chelan are popular choices for their rich flavor and vibrant color. Sour cherries (like Montmorency) are also fantastic, often yielding a more intensely tart and traditional jam, though you might adjust the sugar content accordingly. Always select firm, ripe cherries without blemishes.
- Granulated Sugar: Sugar serves multiple crucial roles: it’s a sweetener, a gelling agent, and a preservative. The ratio of sugar to fruit is important for both flavor and shelf stability.
- Lemon Juice: This isn't just for flavor (though it does brighten the fruit notes!). Lemon juice provides the necessary acidity to help activate the pectin in the cherries, which is essential for the jam to set properly. Without it, your jam might be more of a sauce.
- Pectin (Optional): Cherries naturally contain some pectin, especially when slightly under-ripe. However, some recipes call for added commercial pectin to ensure a reliable set, especially if you prefer a firmer jam or are using very ripe fruit. High-quality fruit and proper cooking often mean you can make a delicious, naturally set jam without added pectin.
- Large, Heavy-Bottomed Pot: Essential for even heat distribution and preventing scorching.
- Cherry Pitter: A small investment that saves a lot of time and mess.
- Canning Jars with Lids and Bands: If you plan to preserve your jam for long-term storage, heat-safe jars and new lids are critical.
- Canning Funnel: To minimize mess when filling jars.
- Ladle: For transferring hot jam.
- Heatproof Spatula or Wooden Spoon: For stirring.
- Potato Masher (Optional): To gently break down cherries for a chunkier jam.
- Candy Thermometer (Optional but recommended): For accurately gauging when the jam has reached its setting point.
Crafting Your Own Cherry Jam Preserves: A Step-by-Step Guide
Making homemade cherry jam preserves is a therapeutic process that requires a little patience but rewards you with immense satisfaction. Here’s a general overview of the steps involved:1. Prepare Your Cherries
Start by washing your fresh cherries thoroughly. The most time-consuming part of this process is often pitting. A good cherry pitter can speed this up considerably. You can pit the cherries whole or halve them first, depending on your preferred texture – whole pitted cherries will give you a chunkier jam, while halving them will lead to a smoother consistency. Don't worry about perfection; a few small pieces of pit won't ruin your jam, but try to be as thorough as possible.
2. Combine and Macerate (Optional but Recommended)
In your large, heavy-bottomed pot, combine the pitted cherries, sugar, and lemon juice. Many experienced preservers recommend letting this mixture sit for 30 minutes to a few hours (or even overnight in the refrigerator). This process, called maceration, draws out the natural juices from the cherries, helping the sugar dissolve and kick-starting the flavor development. It can also reduce overall cooking time and improve the jam's texture.
3. Cook the Jam
Place the pot over medium-high heat. Bring the mixture to a rolling boil, stirring frequently to prevent sticking. Once boiling, reduce the heat slightly to maintain a vigorous boil that you can still stir down. Continue cooking, stirring regularly, especially as the mixture thickens. This stage is where the magic happens: the fruit breaks down, the sugar caramelizes slightly, and the pectin activates.
As it cooks, you'll notice a foam forming on the surface. While some prefer to skim this off for a clearer jam, it's not strictly necessary. Cook until the jam reaches its setting point. There are a few ways to test for this:
- Temperature Test: The most reliable method is using a candy thermometer. Most jams set around 218-220°F (103-104°C) at sea level.
- Freezer Plate Test: Before you start cooking, place a few small plates in your freezer. When you think the jam is ready, spoon a small amount onto a chilled plate. Let it sit for a minute, then push it with your finger. If it wrinkles and holds its shape, it's ready. If it's still runny, continue cooking and re-test.
Patience truly is a virtue during this phase. Don't rush it; allowing the jam to cook down properly will give you the best flavor and set. For a deeper dive into making homemade fruit spreads, consider this resource: Easy Homemade Cherry Jam: Summer Flavor & Self-Care.
4. Fill and Process Jars
Once your jam has reached the setting point, remove it from the heat. Carefully ladle the hot jam into sterilized canning jars, leaving about ¼ inch of headspace. Wipe the rims clean, center new lids on the jars, and screw on the bands until finger-tight. For long-term shelf stability, process the jars in a boiling water bath canner according to established canning guidelines (typically 10-15 minutes, adjusted for altitude). This creates a vacuum seal, preserving your jam safely. If you're not planning to can, simply refrigerate the jam once cooled and enjoy within a few weeks.
Beyond the Jar: Creative Ways to Enjoy Your Cherry Jam Preserves
Once you’ve experienced the unparalleled taste of homemade cherry jam preserves, you’ll find endless ways to incorporate this ruby-red delight into your culinary repertoire. It's far more versatile than just a spread for toast, though it excels at that, too! Consider these delightful applications:- Breakfast Bliss: Beyond the classic toast, swirl it into your morning oatmeal or yogurt, spread it on warm croissants, or use it as a filling for crepes and pancakes.
- Dessert Dynamo: Elevate simple desserts by drizzling warm cherry jam over vanilla ice cream, using it as a filling for thumbprint cookies, tarts, or layered cakes. It pairs wonderfully with chocolate, almonds, and cream cheese.
- Savory Surprises: Don't underestimate its savory potential! Cherry jam makes an excellent glaze for roasted pork or chicken, a sophisticated accompaniment to a cheese board (especially with goat cheese or brie), or even a vibrant element in a gourmet sandwich.
- Baked Goods Booster: Incorporate it into muffins, scones, or even as a surprise layer in bread puddings.
- Gift of Love: Beautifully packaged jars of homemade cherry preserves make thoughtful and much-appreciated gifts for friends, family, and neighbors.
Each spoonful is a reminder of the care and effort you put into making it, a taste of summer preserved for any season. The options are truly limitless, making your homemade jam a star in your kitchen.
