Beyond Store-Bought: Elevate Toast with Homemade Cherry Jam
Imagine a vibrant burst of summer flavor, captured in a jar, ready to brighten even the dreariest morning. That’s the magic of Easy Homemade Cherry Jam: Summer Flavor & Self-Care, especially when it comes to exquisite cherry jam preserves. While store shelves are laden with countless options, there’s an undeniable allure and superior taste that only a batch made from scratch can offer. It’s more than just a spread; it's a sensory experience, a trip back to sun-drenched orchards, and a testament to the simple joy of creating something beautiful with your own hands.
Many of us grew up with the comforting presence of jam jars in our pantries, perhaps even witnessing grandparents transform baskets of fruit into glistening, jewel-toned treasures. This tradition of making cherry jam preserves isn't just about food preservation; it's about connecting with a simpler way of life, savoring the bounty of the season, and infusing love into every spoonful. Once you experience the unparalleled taste and texture of homemade, the notion of returning to mass-produced varieties will seem a distant memory.
The Irresistible Allure of Homemade Cherry Jam Preserves
What truly sets homemade cherry jam preserves apart from their store-bought counterparts? It boils down to a few key factors that profoundly impact the flavor, texture, and overall experience.
- Unmatched Freshness and Flavor Intensity: When you make jam at home, you’re using peak-season fresh cherries, often picked just hours before they hit your pot. This immediacy means the natural sweetness and tartness of the cherries are at their absolute best, translating into a vibrant, fruit-forward flavor that commercially produced jams, which often rely on concentrated fruit or artificial flavorings, simply cannot replicate. Each spoonful delivers an authentic taste of summer, bursting with the natural essence of the fruit.
- Control Over Ingredients: Making your own means you dictate what goes into the jar. You can choose organic cherries, adjust the sugar content to your preference (less sweet for a tarter jam, more for a classic preserve), and avoid unwanted additives, preservatives, or high-fructose corn syrup often found in store-bought options. This control not only contributes to a healthier product but also allows for a customized flavor profile that perfectly suits your palate.
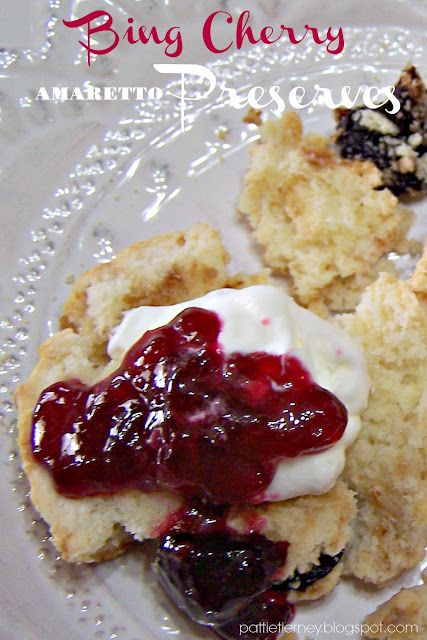
- The Satisfying Texture: Homemade cherry jam preserves often boast a more rustic, fruit-laden texture. You might find chunks of tender cherry, a slightly less uniform consistency, and a glistening ruby-red sheen that speaks volumes about its handmade origins. This textural difference adds to the appeal, making each bite more interesting and satisfying.
- A Therapeutic Kitchen Project: Beyond the culinary benefits, the act of making cherry jam preserves is incredibly rewarding. It's a mindful activity that encourages you to slow down, engage your senses, and appreciate the transformation of raw ingredients into something exquisite. As many enthusiasts attest, it’s a form of self-care, a calming escape from the daily rush. For a deeper dive into the self-care aspect and summer flavors, check out Easy Homemade Cherry Jam: Summer Flavor & Self-Care.
Crafting Your Own Cherry Jam Preserves: Simplicity and Flavor
The beauty of making cherry jam preserves lies in its surprising simplicity. You don’t need an arsenal of gourmet equipment or years of culinary experience. The fundamental ingredients are cherries, sugar, and lemon juice. Patience, as they say, is also a key ingredient in all good things!
Essential Ingredients and Their Roles:
- Cherries: The star of the show. Both sweet cherries (like Bing or Rainier) and tart cherries (like Montmorency) work wonderfully, each yielding a distinct flavor profile. Tart cherries often create a more intensely flavored jam that benefits from a bit more sugar, while sweet cherries produce a mellow, naturally sweeter spread. Ensure your cherries are ripe, firm, and free from blemishes.
- Sugar: More than just a sweetener, sugar plays a crucial role in preserving the fruit, helping the jam set, and enhancing its vibrant color. The quantity can be adjusted slightly, but reducing it too much can affect the jam's shelf life and ability to gel. Granulated sugar is typically used.
- Lemon Juice: This isn't just for flavor; lemon juice (or other acidic ingredients) is vital for proper gelling. Cherries are low in pectin, a natural gelling agent found in fruit. The acidity in lemon juice helps activate the pectin, ensuring your jam sets beautifully. It also brightens the flavor of the cherries, preventing them from tasting flat.
- Pectin (Optional but Recommended): While some traditional recipes rely solely on the natural pectin in fruit and lemon juice, adding commercial pectin can guarantee a firmer set, especially with low-pectin fruits like cherries. It also allows for shorter cooking times, preserving more of the fresh fruit flavor. If using pectin, always follow the package directions carefully, as different types require varying amounts of sugar and cooking methods.
The Basic Steps to Delicious Cherry Jam Preserves:
- Prepare Your Cherries: Wash the cherries thoroughly. Pitting can be the most time-consuming part, but a cherry pitter makes quick work of it. You can also halve them and remove the pits by hand. Aim for about 4-6 cups of pitted cherries for a standard batch.
- Combine and Macerate: In a large, heavy-bottomed pot, combine the pitted cherries, sugar, and lemon juice. Many recipes suggest letting this mixture sit for an hour or two (or even overnight) to allow the sugar to draw out the juices from the cherries. This step, called maceration, helps prevent the fruit from scorching during cooking.
- Cook the Jam: Bring the mixture to a boil over medium-high heat, stirring constantly to dissolve the sugar. Once boiling, reduce the heat slightly and continue to cook, stirring frequently, until the jam thickens. This can take anywhere from 15 minutes to an hour, depending on the volume and whether you’re using pectin.
- Test for Set: This is a critical step. There are several ways:
- Cold Plate Test: Place a small spoonful of hot jam onto a plate that has been chilled in the freezer. Let it sit for a minute, then push it with your finger. If it wrinkles, it's ready.
- Temperature Test: Use a candy thermometer. Jam is typically set when it reaches 220°F (104°C) at sea level.
- Sheet Test: Dip a cold spoon into the jam, lift it, and turn it sideways. If two drops merge and sheet off the spoon, it's ready.
- Jar It Up: Ladle the hot jam into sterilized canning jars, leaving about ¼ inch of headspace. Wipe the rims clean, place on new lids, and screw on the bands finger-tight.
Beyond the Basics: Elevating Your Cherry Jam Preserves
While classic cherry jam preserves are undoubtedly delicious, there's a world of possibilities to explore when it comes to enhancing flavor and versatility.
- Flavor Infusions:
- Vanilla: Add a vanilla bean pod (split lengthwise) to the jam during cooking, or a teaspoon of pure vanilla extract at the very end. Cherry vanilla jam is a popular, sophisticated twist.
- Almond: A few drops of almond extract complement cherries beautifully. Add it after the jam is cooked, just before jarring.
- Spices: A pinch of cinnamon, star anise, cardamom, or even a tiny amount of fresh ginger can add warmth and complexity. Add these during the cooking process.
- Liqueurs: A splash of kirsch (cherry brandy) or Grand Marnier (orange liqueur) can be stirred in at the end for an adult twist.
- Creative Uses:
- Glazes and Sauces: Thin your jam slightly with a bit of hot water or fruit juice and use it as a glaze for roasted meats (pork or duck), a sauce for cheesecakes, or a topping for pancakes and waffles.
- Baking: Incorporate into tarts, turnovers, thumbprint cookies, or as a filling for layer cakes.
- Savory Pairings: Don't limit jam to sweet applications. Cherry preserves pair wonderfully with strong cheeses on a charcuterie board, or as a condiment for grilled chicken or pork chops.
- Beverages: Stir a spoonful into sparkling water, iced tea, or even a cocktail for a fruity twist.
Canning Your Cherry Jam Preserves: For Longevity and Peace of Mind
Proper canning techniques are essential for ensuring the safety and extended shelf life of your homemade cherry jam preserves. While refrigeration will keep opened jars fresh for several weeks, water bath canning allows you to store sealed jars in your pantry for up to a year or more.
- Sterilization: Always start with clean, sterilized jars. You can achieve this by washing them in hot, soapy water and then boiling them for 10 minutes, or running them through a dishwasher on a hot sanitize cycle. Keep them hot until ready to fill.
- Headspace: When filling jars, leave the recommended amount of headspace (usually ¼ inch) between the jam and the rim of the jar. This space allows for expansion during processing and helps create a strong vacuum seal.
- Water Bath Processing:
- Place filled and sealed jars in a large stockpot or canning pot fitted with a rack, ensuring they are covered by at least 1-2 inches of boiling water.
- Bring the water back to a full, rolling boil.
- Process the jars for the time specified in your recipe (typically 10-15 minutes for jams, adjusting for altitude).
- Carefully remove jars from the canner and place them on a clean towel or cooling rack, ensuring they are not touching. Do not disturb them for 12-24 hours.
- Checking the Seal: After cooling, check the seals by pressing on the center of each lid. If it doesn't flex, the jar is sealed. Unsealed jars should be refrigerated and consumed within a few weeks.
The entire canning process, from preparing the fruit to hearing the satisfying "pop" of a sealed jar, can be incredibly gratifying. If you're interested in the calming and rewarding aspects of the canning process itself, we've explored this further in Calming & Rewarding: Make Cherry Preserves from Scratch.
Conclusion: The Sweet Rewards of Homemade Cherry Jam Preserves
Embarking on the journey of making your own cherry jam preserves is a decision you won't regret. It's an opportunity to connect with your food, exercise creativity in the kitchen, and bring an unparalleled burst of summer flavor to your everyday meals. From the simple satisfaction of spreading glossy, ruby-red jam on warm toast to using it as a sophisticated glaze for a special dinner, the possibilities are endless. So, gather your cherries, embrace the warmth of your kitchen, and prepare to be utterly charmed by the sweet rewards of homemade goodness. Trust us, once you've tasted the difference, you'll wonder why you ever settled for store-bought.
